

All About That (Multi)Base: Part Deux
Hello again! Billy’s back with part two of my article about how to build dynamic multibases. Last time, I showed the supplies and process I go through when building my bases. In this installment, I’ll be discussing how I go about painting my multibases. First off, you’ll need some stuff.
Supplies
- Primer. I usually find one that matches the bases I’m going to do. In this case, it’s a brown.
- A few paints to drybrush with. I usually buy cheap $1 craft paints from your local WalMart or other big box store.
- Dark grey
- Lighter grey
- Bone/ivory
- White
- A variety of washes. All different colors.
- Cheap craft store brushes.
- Tufts: Good tufts are an awesome tool. They can add height differences to your grass as well as break up the colors on your bases.
- Flock/Electrostatic Grass/Flowers/etc: Finally, all of these extra bits of texture really make bases come to life. There are thousands of options out there, but the key is to really know what you plan on using them for, and use enough variety to make them appear natural.
I like to start with a spray primer that matches what I’m trying to paint. This saves a lot of time because not I don’t have to basecoat the soil. It’s a two-in-one step!

Next, I basecoat the rocks and any other terrain bits with the darker grey. Remember, these don’t need to be perfect. They’ll be covered by several washes, layers of drybrushing, and perhaps even flock or tufts.

Stipple or sponge on a variety of washes onto the stone or rocks on your bases. I use purple, blue, orange, green, and brown. Be sure to let the colors overlap onto each other for a more natural look. It will look kind of terrible at this step, but that’s okay. These different washes will give your stone a more natural weathered appearance.

Give the washes plenty of time to dry, and then move on to the next step: an all over dark wash. For this, I usually make my own wash out of craft paints, tap water, and a drop or two of Dawn dishsoap. I mix mine up in those small tupperware containers that aren’t good for anything. You’ll need to play around with the levels, but my basic recipe goes like this:
- Equal parts black and brown craft paint. (You can play with this to get a color you like or that works for you. I’m using it as a substitute for Nuln Oil, so I wanted a dirty, black brown wash)
- Add water until you end up with a milk-like consistency. It should go on translucent.
- Add a drop or two of Dawn, depending on how much you’re making. The dish soap allows the pigment to flow a little smoother into the recesses like a wash would.
- You will be tempted to shake the container to mix it up. Don’t. Shaking it will cause a bunch of bubbles to form because of the soap and then you’ll have to wait for those to dissipate before you can use the wash. Use something to stir the mixture until it’s smooth.
Apply the homemade wash all over the base. I mean on everything. This step kind of ties all the colors together and tones down the wacky assortment of washes. Be sure to put down some newspaper or something to catch the wash that drips down the sides. I usually give this step several hours to dry just to make sure that the washes don’t mix in while you’re trying to drybrush.

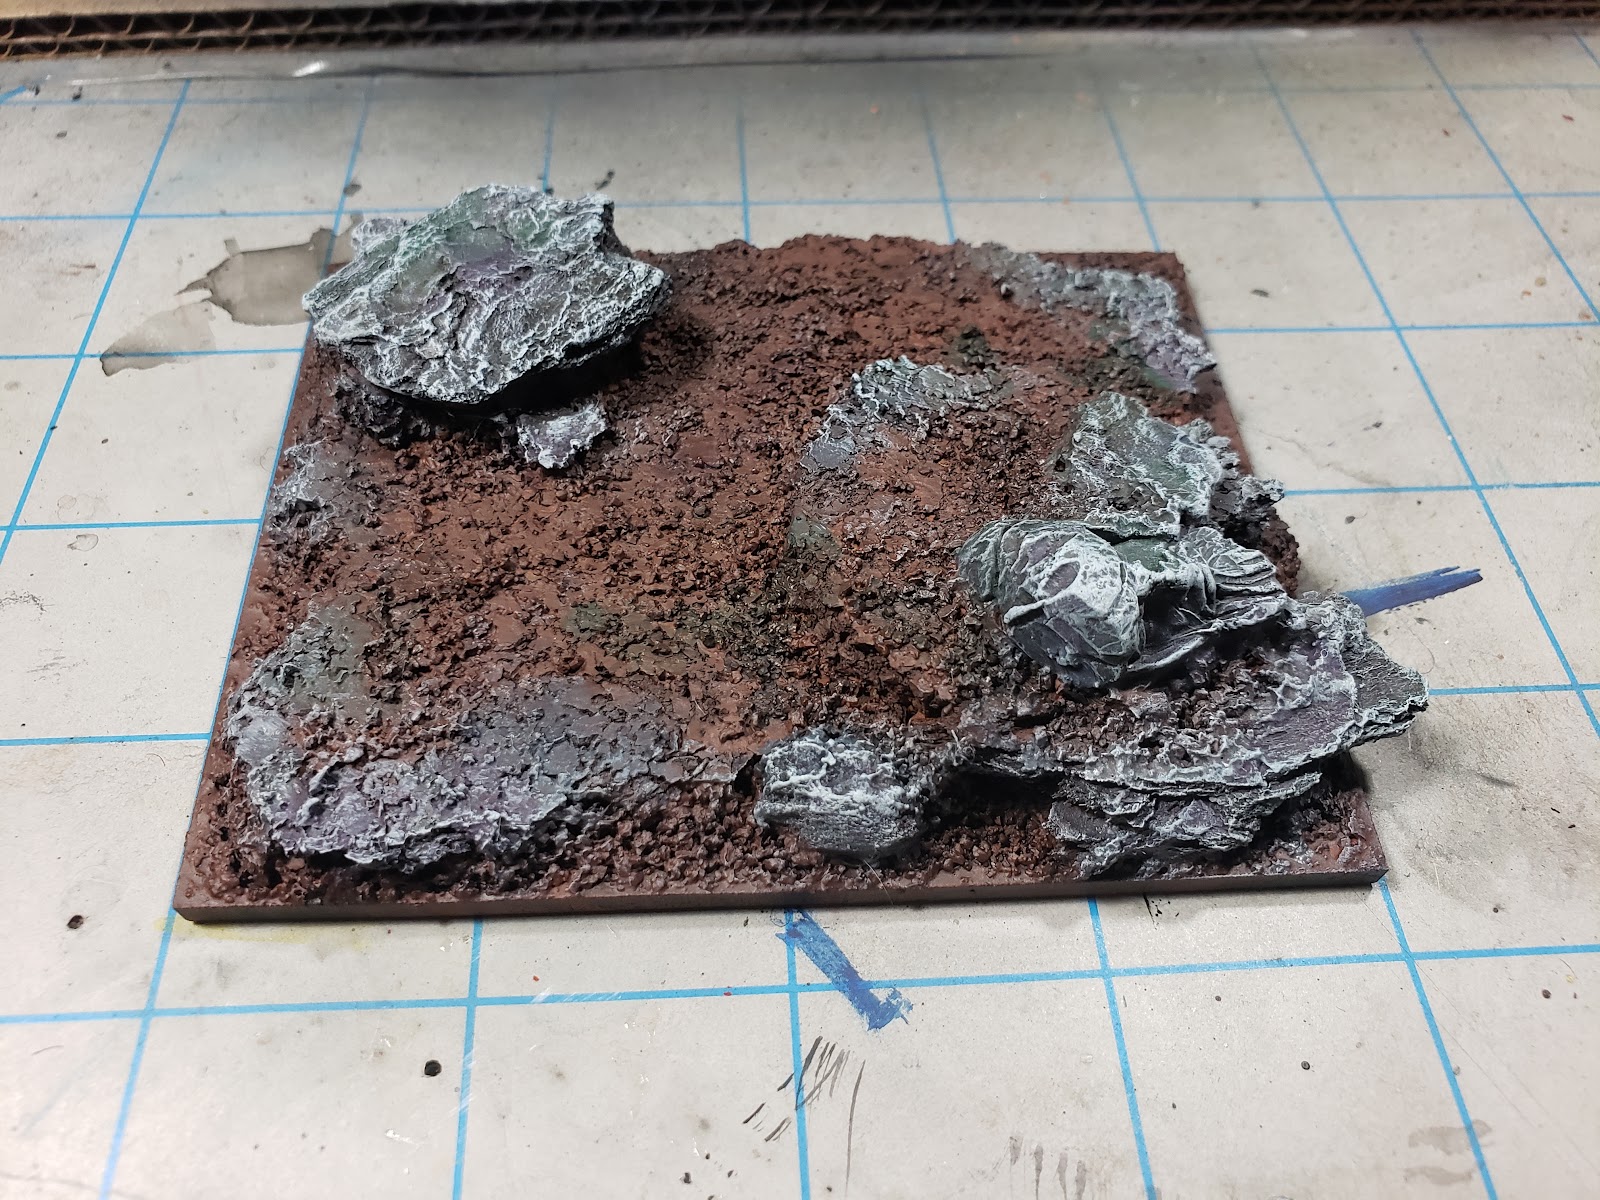
After the wash is fully dried, it’s time to drybrush! I do the drybrushing in a specific order to save time.
- Drybrush the stones with the same dark grey I basecoated them with. This shouldn’t be a super heavy drybrush. Remember, you can always add more later. You don’t want to mess up what you’ve done so far. Also, I don’t worry too much about overbrushing onto the dirt surrounding the stones at this stage. It will only work to blend the colors in with each other.
- Drybrush the stones with a lighter grey. Depending on how much flock and stuff is going to go on and how crazy detailed you want to go, you could drybrush a bunch of different layers. I find that two or three layers of grey is just fine.
- Drybrush the ENTIRE BASE with the bone color. Make sure that this one is done very lightly as well. This layer ties the whole base together and unifies it into a cohesive scene.
- Finally, do a VERY light drybrush of white just on the tips of the stones. This just makes them pop a little more against the brown of the soil.
And now we’re pretty much done with the painting steps! If you have any other terrain features that need to be painted, I’d do those now that the messy drybrushing step is out of the way. I don’t have any of that to do here, so I’m ready to move on.
I always like to matte varnish at this step. It prevents the washes and other paints from running as you apply glue for tufts and grass, but it’s especially helpful if you’re doing snow. I’ve found that when I try to apply snow texture to unvarnished bases, the washes want to mix with your snow and make it look like the kind of snow a plow leaves behind on a dirty street. Not so good for basing fantasy miniatures!
Start applying tufts, flock, moss, and anything else you’d like to add! I’m using a mixture of dark green moss, spring green tufts, flower tufts, and summer mix electrostatic grass.
- Superglue down the moss (alternatively you could use matte medium, but be careful not to use too much: the stuff can frost if you go overboard)
- Superglue down any tufts. Remember to be kind of random about it, but you want to make sure that they can be seen and flow once miniatures are placed on the bases. The best part about this step is that it can hide any imperfections in your bases that you might have missed during the texturing step.
- Using watered down PVA glue, apply static grass. I find it’s best to almost drybrush on the glue to give it a more natural look. The randomness of the patches will lend itself to a more realistic scene. Make sure to avoid getting too much glue on the tufts themselves as you don’t want grass stuck to your grass. Static grass applicators are awesome if you have one, but if not, the tried and true “dump it on and shake off the excess” method can work just fine.
- After the grass is glued down, I like to use my airbrush turned up to a high PSI to blow away any stuck-on excess grass. This also helps if you don’t have a grass applicator as it can make the grass pieces stand up a little better. After getting most of the excess off, I use one of my large, cheap craft brushes to dust off the tufts, being sure to remove as much of the excess grass as possible.
- After that, we paint the edge of the base, and we’re good to go! This step really just makes the base look a lot cleaner and is almost like a picture frame for your model. You can do just about any color, but I really like black or neutrals like brown.

Now we’re all done! Using a few easy techniques, we made a base that really looks top notch. These can be done as complex or as simple as you like, so be creative. The only thing left for us to do is add some awesome models. Make sure you pin them, though. You don’t want broken-off models to ruin your amazing craftsmanship. I like to use brass rod and drill all the way through the basing material and into the MDF. This way, your models won’t be going anywhere!
Thanks again, guys. I hope this helps someone out there. Keep being awesome and remember to post pictures of your progress somewhere!


