

Today, we have something special, a guest article from past US Master and all-round awesome guy, Pat Zoro Allen, talking about how to build lists. We at Dash28 thought this would be a perfect thing to bring up with 3rd Edition’s release on the horizon; everyone will be building new lists shortly! A big shout out of thanks to Pat for sending in this amazing article.
Like all good articles, I’ll start with a definition. The canoe is a build archetype I created that became known, in my area, as the Douche CanoeTM. Don’t think much about the reasoning behind the name; there isn’t any.
The build archetype in general focuses on board control through the use of lots and lots of cheap units (about half the army, drops wise). Ideally this is followed up by the hardest hitting, most expensive units your army can field. Bonus points if they have nimble in order to have greater board control and flexibility. If you have ever heard of the Douche KayakTM, that’s the same concept, but streamlined via allies (I usually use Goblins).
What was the original Douche CanoeTM? That hearkens back to before the inaugural CoK book, but after the flyers and pharaoh took the first hit of the nerf bat.

Honestly, I feel dirty just typing it up again. Twelve drops, with six of them being under 390 points. It had a super hammer (10-11 wounds vs. Defense 5), a hammer (7-8 wounds vs. Defense 5), three flying anvils, and a Mr. Fix-it combined with chaff for days. In this version, everything but the chaff is also nimble and can take a punch from most units.
But enough of days gone by. How does this apply to modern Kings of War, 3rd Edition, and beyond? Well the biggest thing I’ve noticed when piloting this list is I had a much easier time when my Ghouls survived to turn two, and that the way I utilized them put a lot of pressure on the enemy, often leading them to making mistakes.
The first thing I realized was that if I was going to use Ghouls instead of Skeleton troops as my chaff, I needed to make sure they could move at the double on the first turn. I then also realized that I would generally have a huge deployment advantage. Half the opponent’s army would normally be out before I dropped a single non-Ghoul unit (except against trash-spam armies).
So with that, let’s look at a CoK19 Douche Canoe army and some general deployment ideas. What this army trades in losing nimble it makes up for in mass fearless (everything is fearless but the ghouls).
I would generally drop 4-5 Ghouls first. Unless my army has a unit that my opponent already knows where it’s going to go (such as a horde of Pikemen by a forest which contains an objective), it’s usually best to deploy the chaff first to see the enemy’s battle plan.

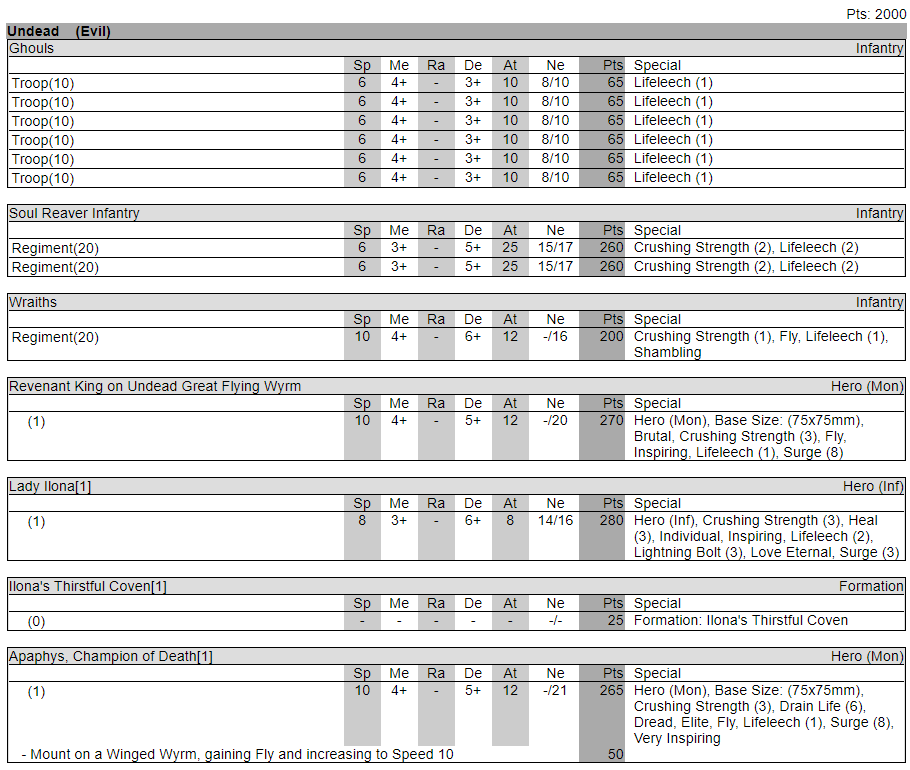
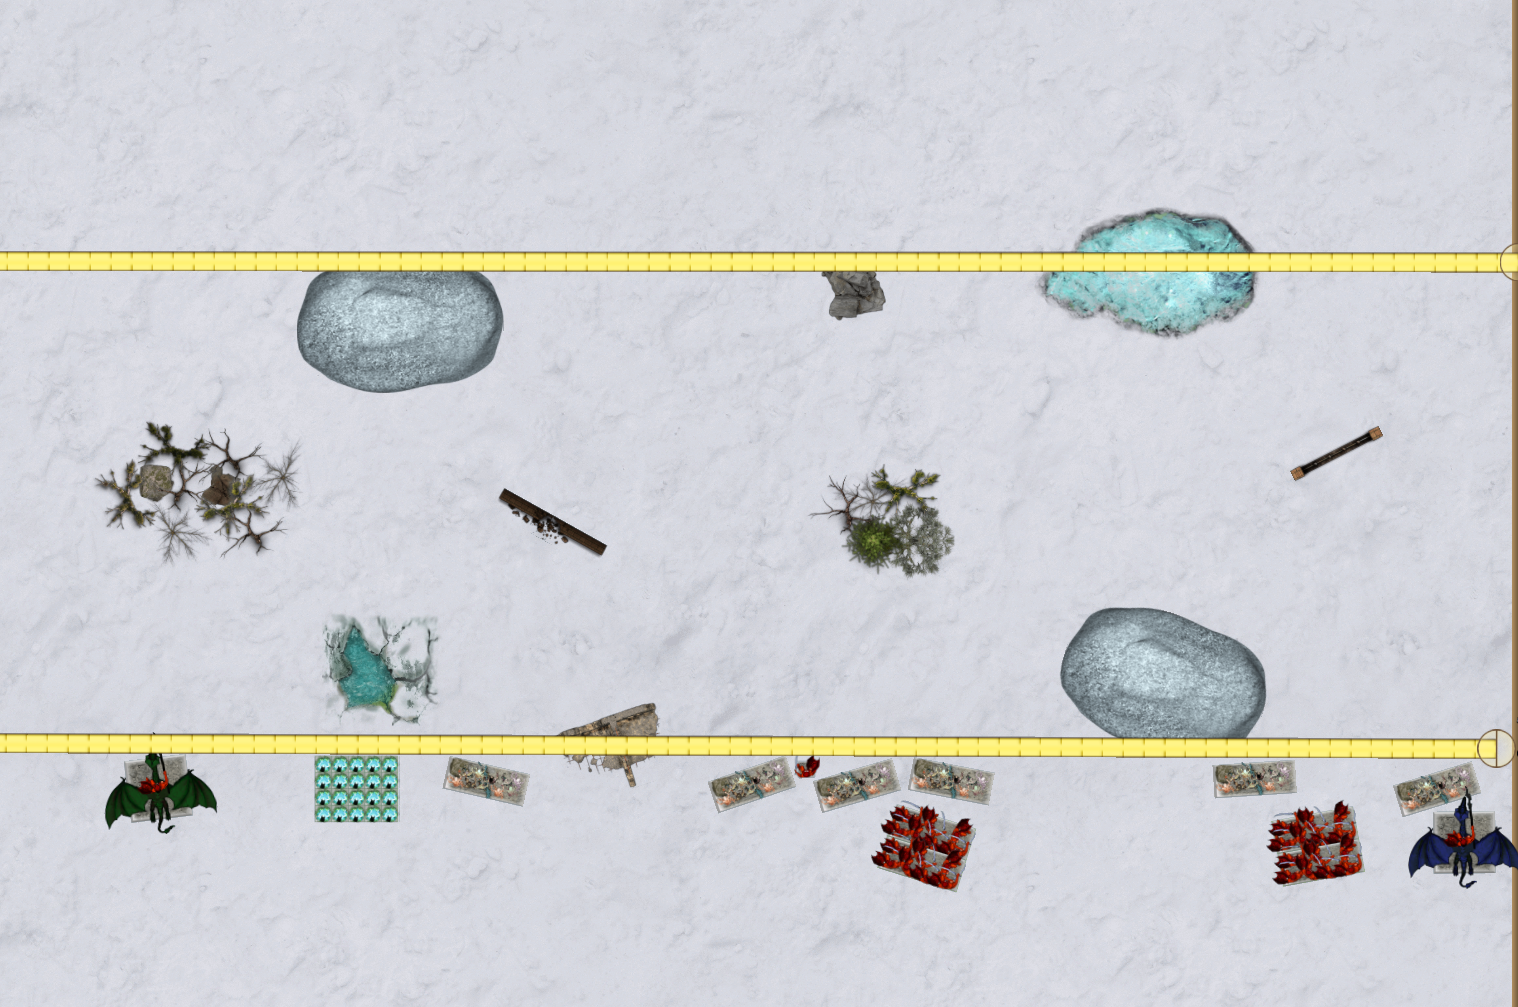
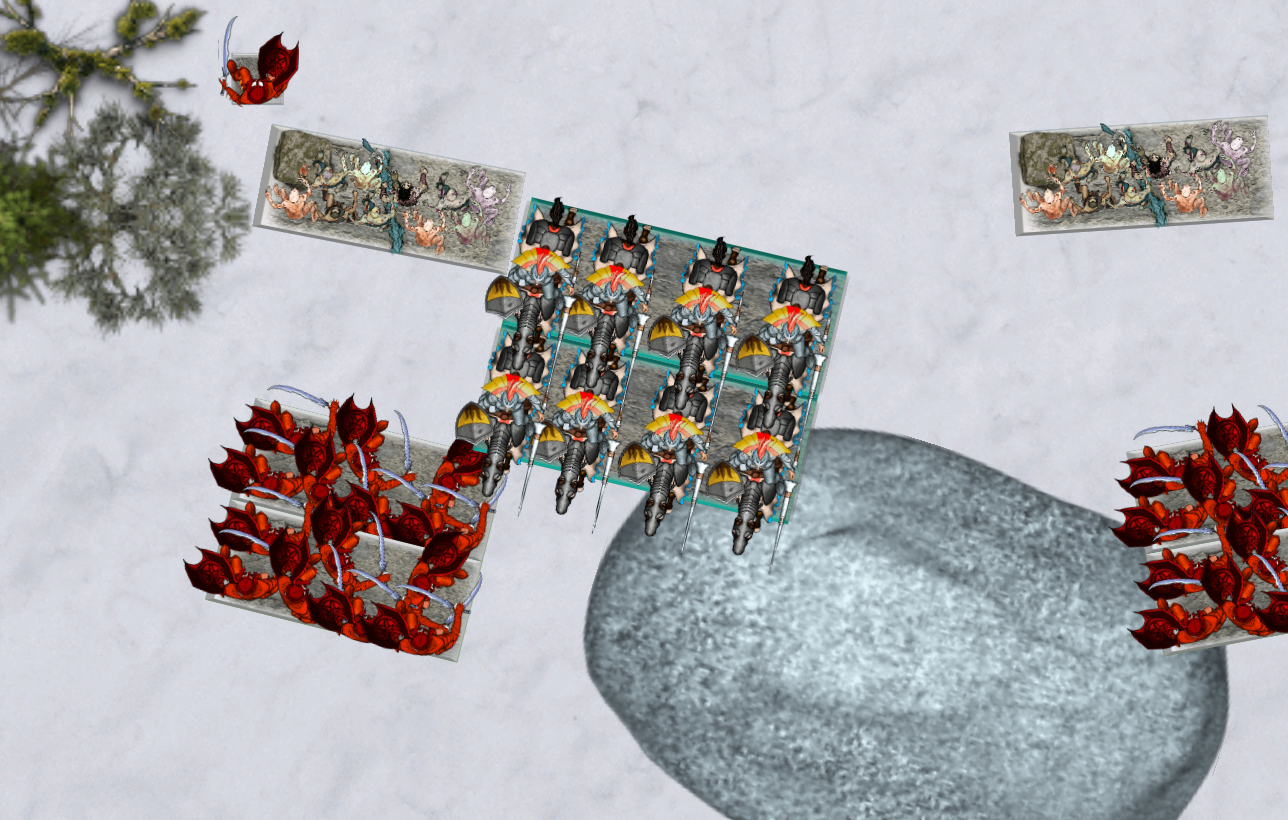
This is a pretty typical map in my meta. Two forests, two hills, two blocking, two flat pieces, and two obstacles. I generally plan on doing an echelon move (anchor one flank, overwhelm the other), rather than a speartip (break through the center) or double envelopment (overwhelm both flanks). With that in mind, I’ve deployed my first four Ghoul troops centrally at angles to both avoid terrain and to set up favorable angles for me.
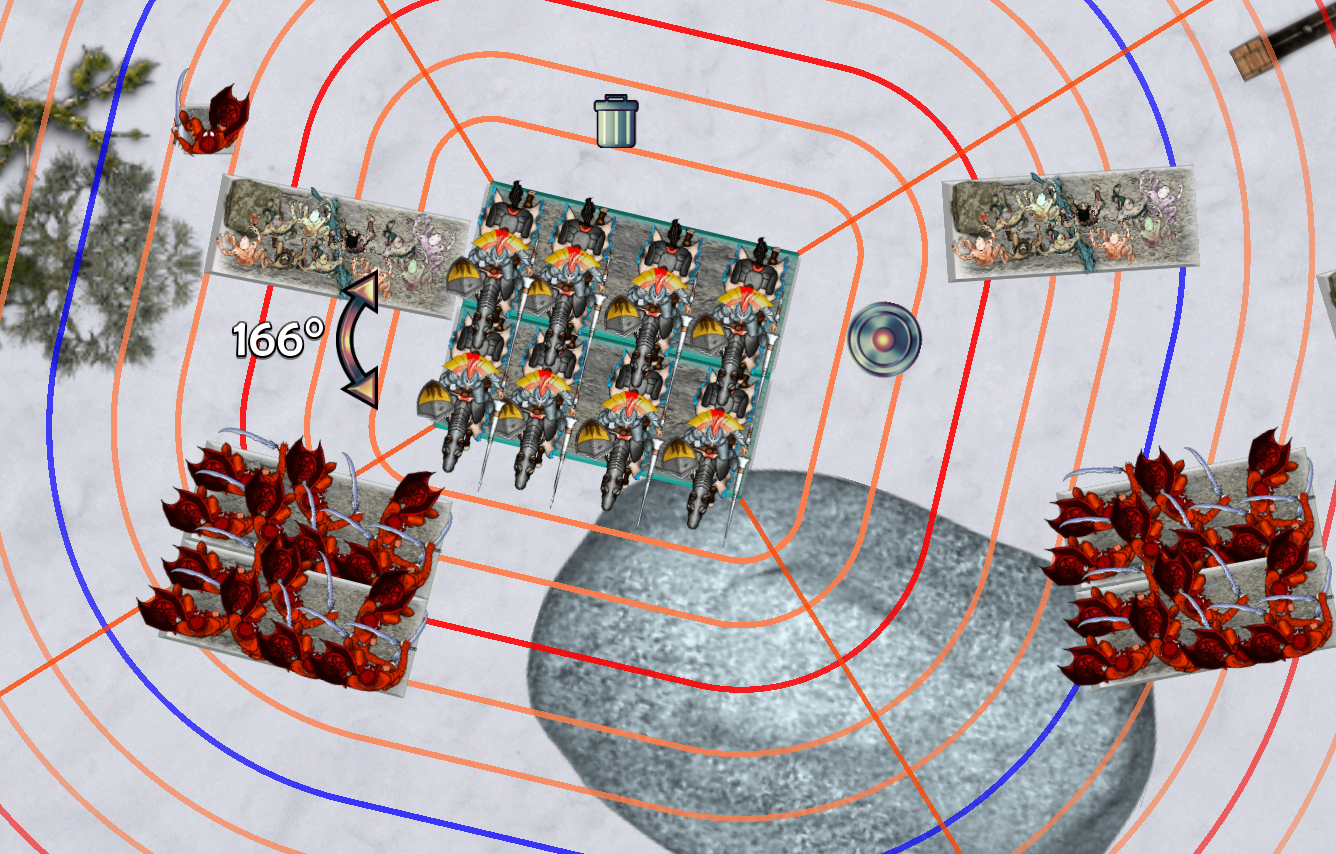
The fifth troop goes on a flank at an angle pointed slightly inward with the idea being that it’ll be hard to get out of arc of that troop; but if the enemy abandons the flank, he is still headed toward the center. The key is to see where they would end up and then move them backward from there. Ideally get good at visualizing this, as these angles can sometimes trip up opponents.
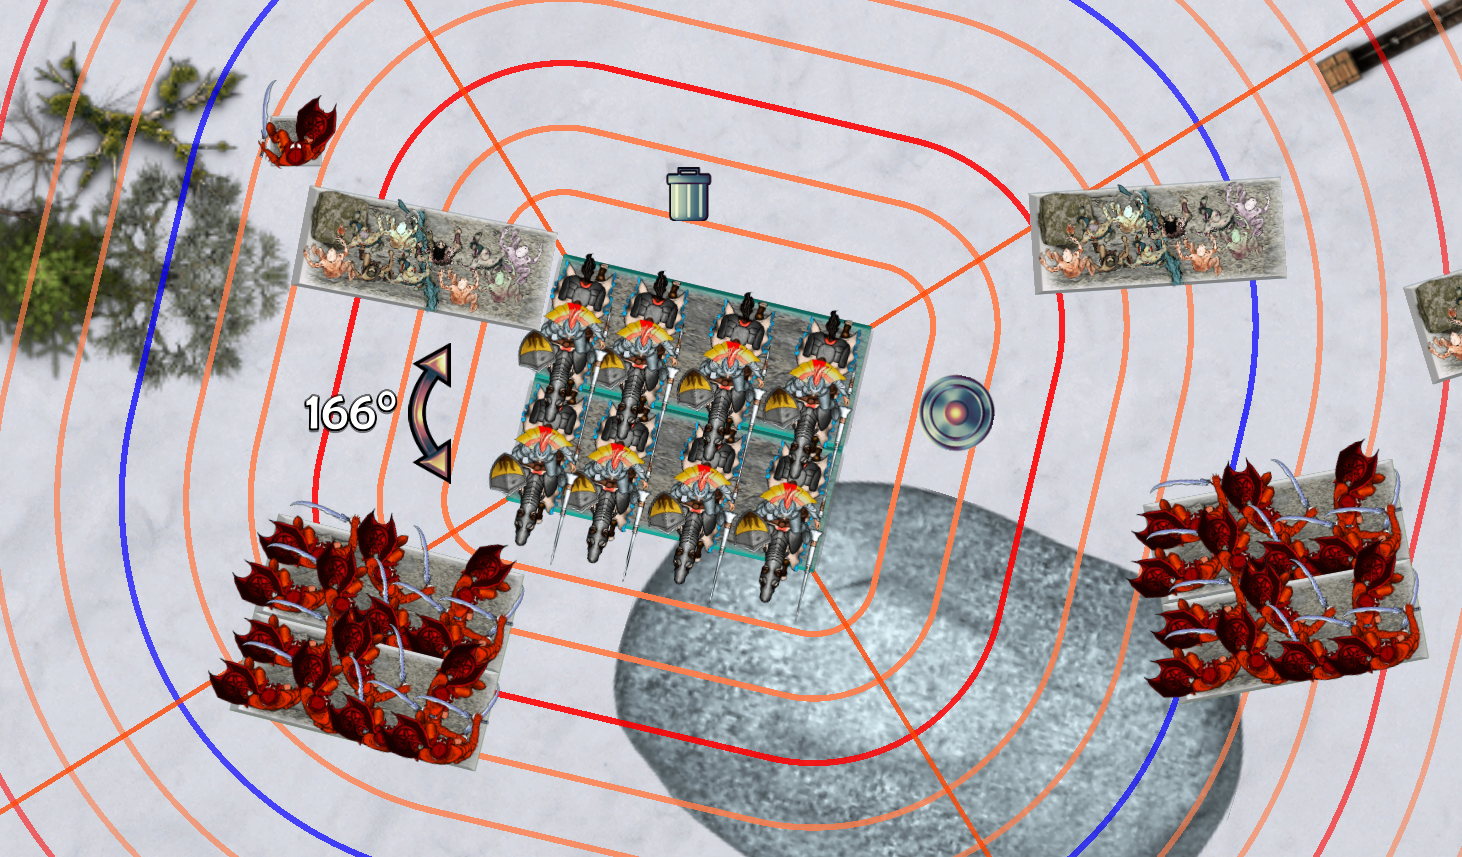
Here’s a shot if all my troops were to move their full distance at the double. There’s quite a bit of field coverage here with a lot of overlap in the center (or wherever the enemy is deploying in force). Right now it looks like I have gaps in that center-right forest and my left flank. With that in mind I now have a decision to make.
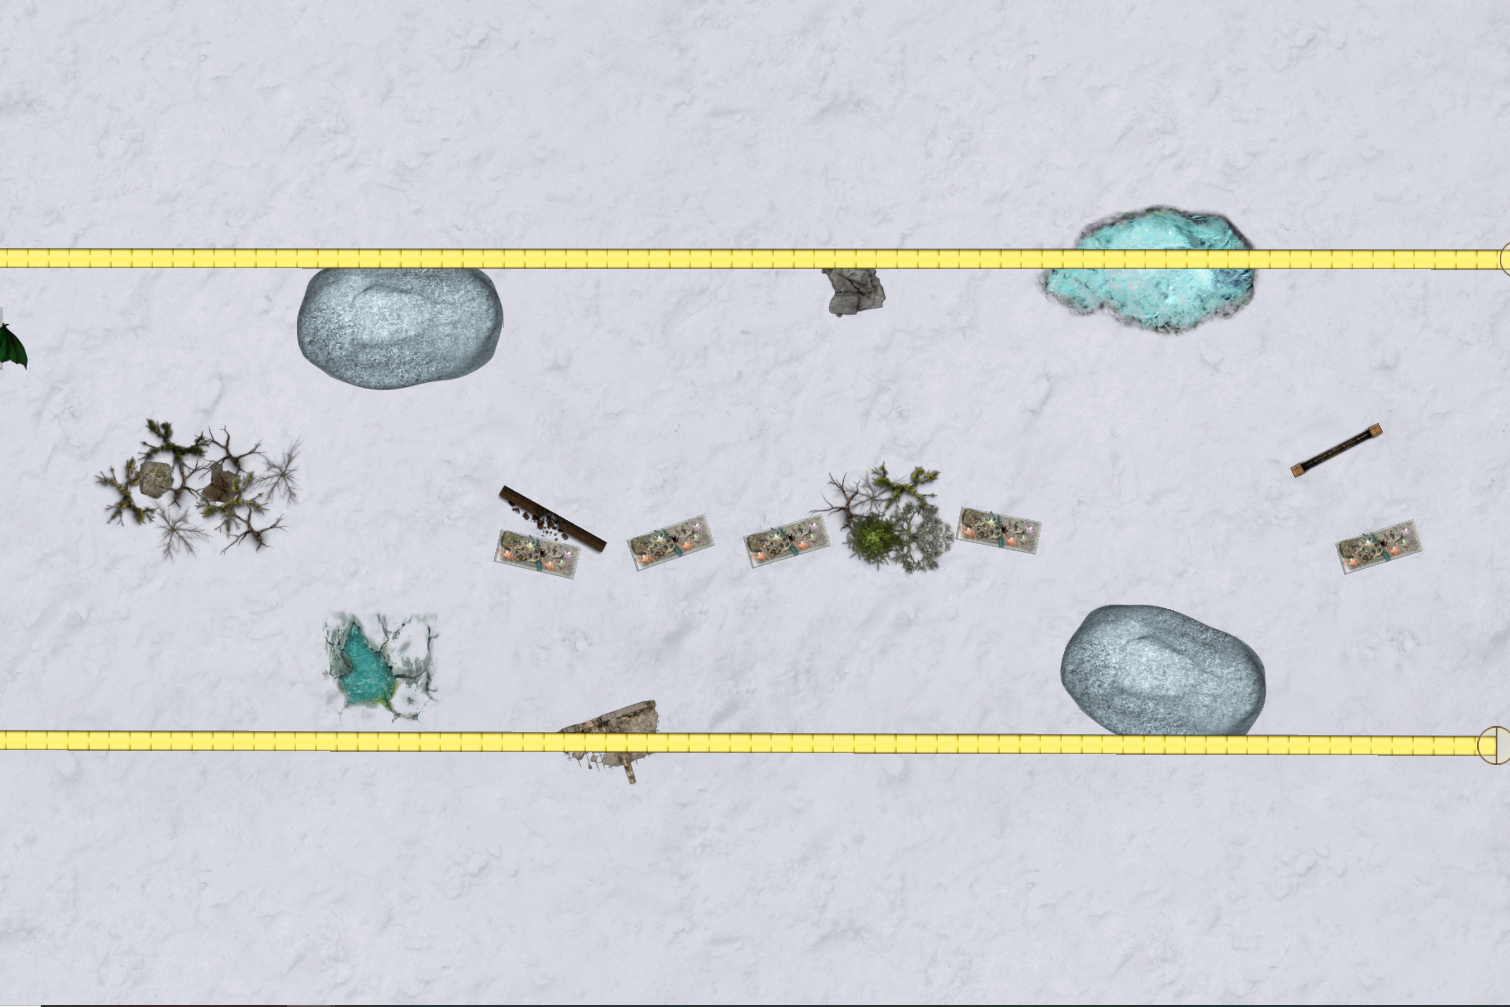
If I already know which flank I’m going to overwhelm (in this scenario let’s say it’ll be the right flank), I can go ahead and deploy one of my flank anchors, which in this list can be the regiment of Wraiths and/or one of the flyers. You want this anchor as far left as you can so that a flyer can’t dodge out of its arc.
In this case, I’m using the Greater Wyrm. If the enemy abandons the flank or tries to delay, it can redeploy or try to jump the lines. I’ve once again deployed him at an angle with the idea of where I’d want him to be if he moves at the double and giving him the option to redeploy toward the center if needed. The idea is to get the enemy to deploy some heavy hitters opposite your flank anchors.
Next I’ll decide if there’s a juicy enough target for my Mr(s). Fix-it (in this list, it’s Lady Illona). If so, I’ll deploy her across from her target. If there isn’t a juicy target, I’ll deploy her centrally to inspire the Ghouls from first turn pings.
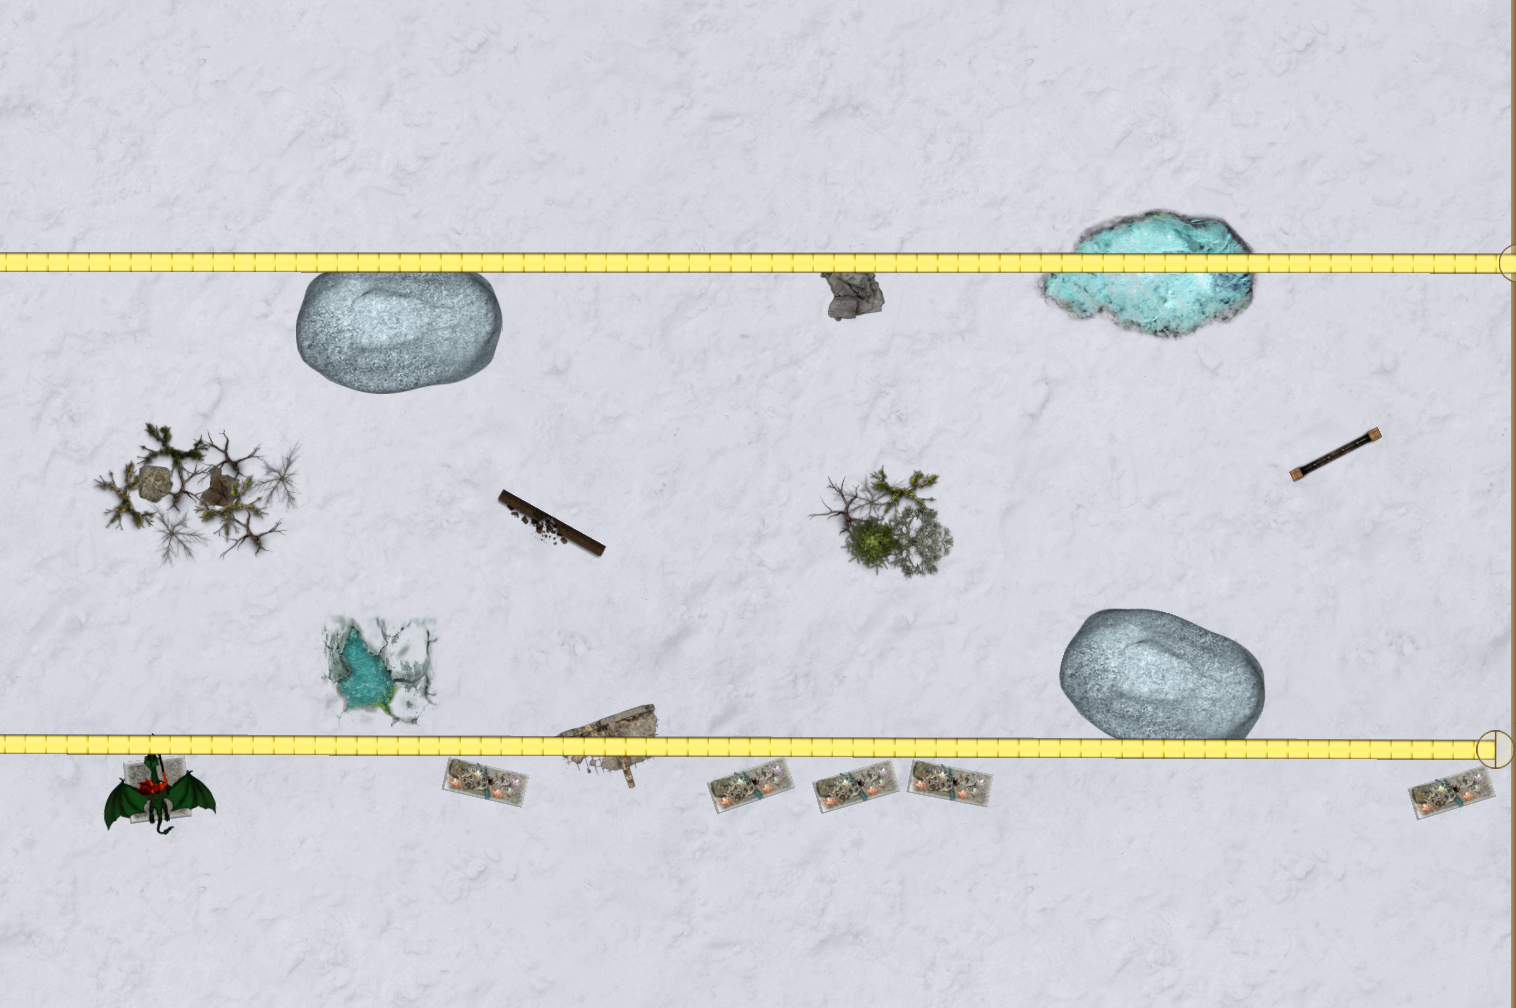
But if there isn’t a juicy target, I’ll go and deploy my next flank anchor. In this list, it’s the Wraiths. At this point, if there isn’t a good target for my Mr(s). Fix-it, I’ll go ahead and deploy her centrally. Note that the three center Ghouls are inspired by Illona, and the Wraiths are inspired by the Greater Wyrm. I generally don’t worry too much about inspiring placement beyond the first turn, but I do like to have coverage where possible for any opening volleys.
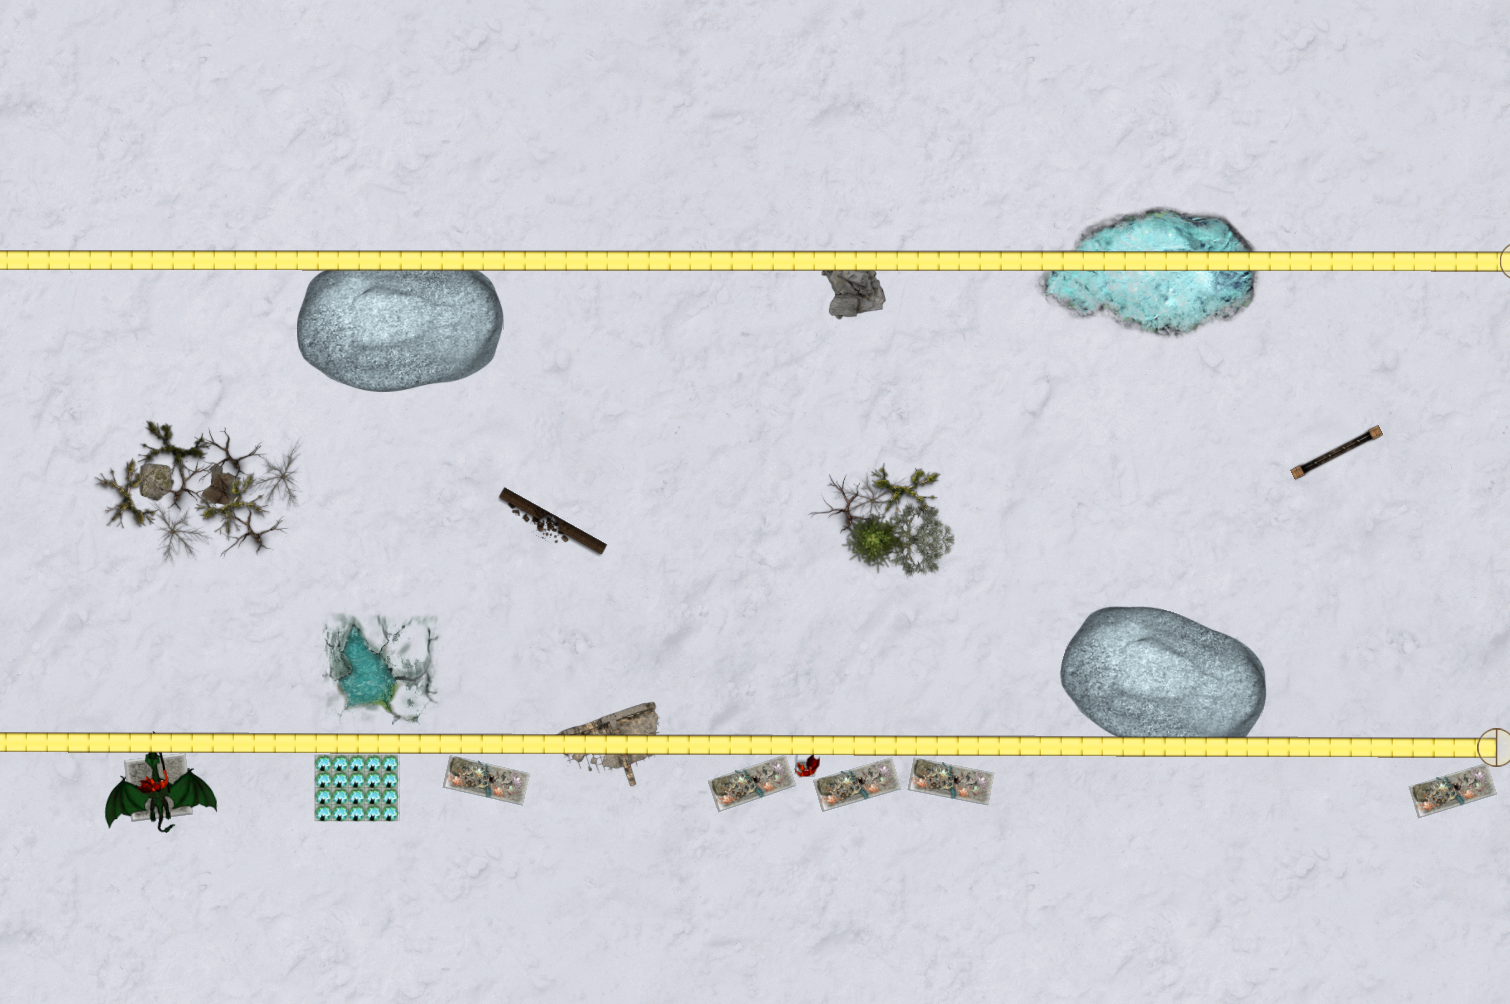
At this point we have committed eight out of our twelve army drops, and it looks like we’re going hard left (which we could still do if the enemy doesn’t take the bait). That last Ghoul troop could buy us a little more time, or it could be saved for a push unit or a unit in reserve. But let’s say that it went as planned and some key hammers are opposite the flank anchors.
We have deployed our heavy hitters to be able to quickly put pressure on the right flank, with Apaphys being able to move up quickly while still being supported. If the enemy has something that can jump into the forest, the center Soul Reavers can cover that, or pivot and support the center. Now let’s look at some first turn moves.

This is an aggressive top of turn 1 approach where the enemy’s forces are concentrated on our left flank. The Wyrm and the Wraiths hang back and threaten the enemy if they try to move toward the center. The central Ghouls move up. Since they have no back up, they stay out of charge range if possible.
On the right, we see our forces have moved forward quickly with the idea of engaging the enemy top of turn 2. Any big unit will be hindered if they charge Apaphys without a re-director, and most units cannot kill -/21 Defense 5 in one go, so we have flanking opportunities with the Ghouls and Soul Reavers. It is pretty important not to put the Soul Reavers too close to the ghouls as you want to be able to maneuver past the troop if it gets wavered. With that being said, put them as close as they need to be so that flyers cannot charge them cleanly.
Quick aside on a tactical option: note that the center Soul Reaver unit actually has a position that a fast opponent could charge into.
However, with the Ghouls present, they would be kept from lining up cleanly. In 2nd Edition, when they bounce the Soul Reavers will actually be in the unit’s flank (even if you don’t bounce 1” from the Ghouls), and counter charges are optional (you may elect to perform a counter charge rather than a regular charge).
In 3rd Edition, the Soul Reavers would disengage, backing up 1”, and achieve the same result. Though it should be pointed out that in 2nd Edition, the knights would bounce back to expose a flank to the other Soul Reavers. In 3rd Edition, they would stay put and thus be out of arc.
This is a very high-risk, high-reward maneuver. In order to bait the enemy into this, you usually need to make it so that the enemy is not in the arc of any other unit, and obviously you could lose your hammer to a lucky roll. Ideally you perform this maneuver when you reasonably suspect that your unit will hold and live to perform the counter-flank. For example, elite Basilean knights should do ~8 wounds to a Defense 5 unit. That would require a 9 twice (less than 25% chance) to break.
But I digress.
If you did need to shift your focus toward the center, like let’s say the opponent decided to abandon your left flank to try and help out on the right, the flank anchors can punish them by threatening flanks and rears if they continue in that direction. The center hammer can pivot and give support to the center Ghouls as needed as well.
You could even fly the Wyrm up 20” to get behind the back arcs. In this scenario, assuming you have enough to push through the right flank, the opponent gives you a double envelopment opportunity. However, if your right flank is now facing unfavorable odds, you could play more conservatively with Apaphys.
This is all well and good for Undead, but how can you apply this to your army? Well, let’s look at some example 2nd Edition lists and deployments. This isn’t going to be nearly as in-depth; this is more about taking the concept and applying it to other armies.
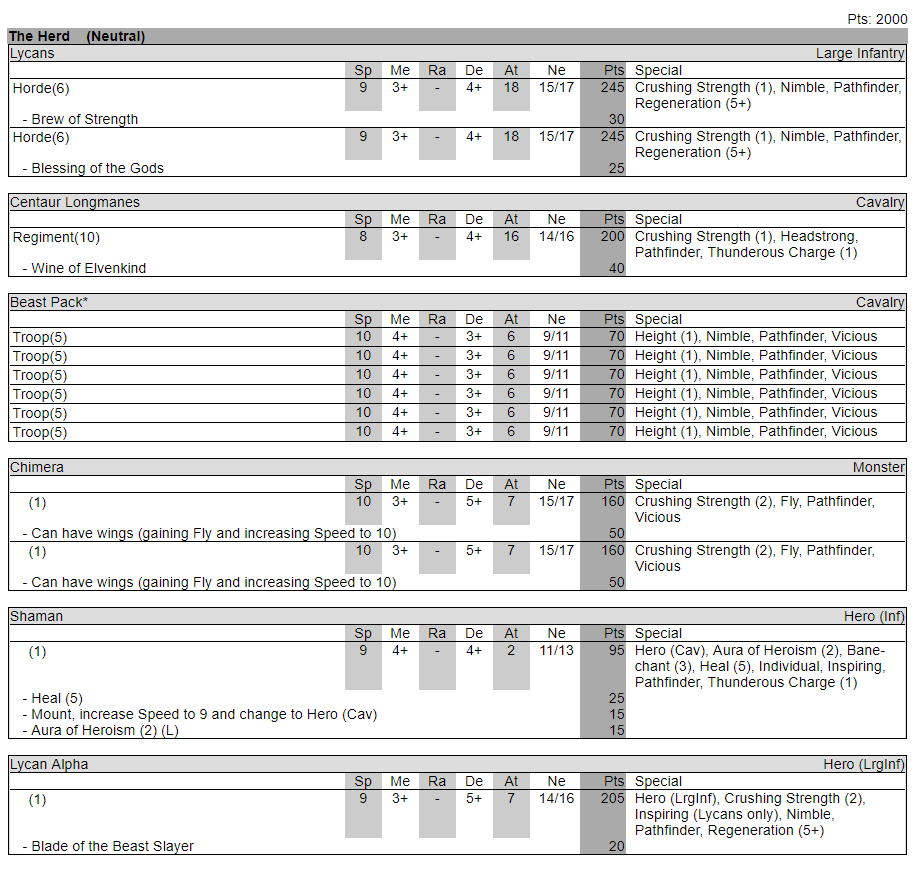
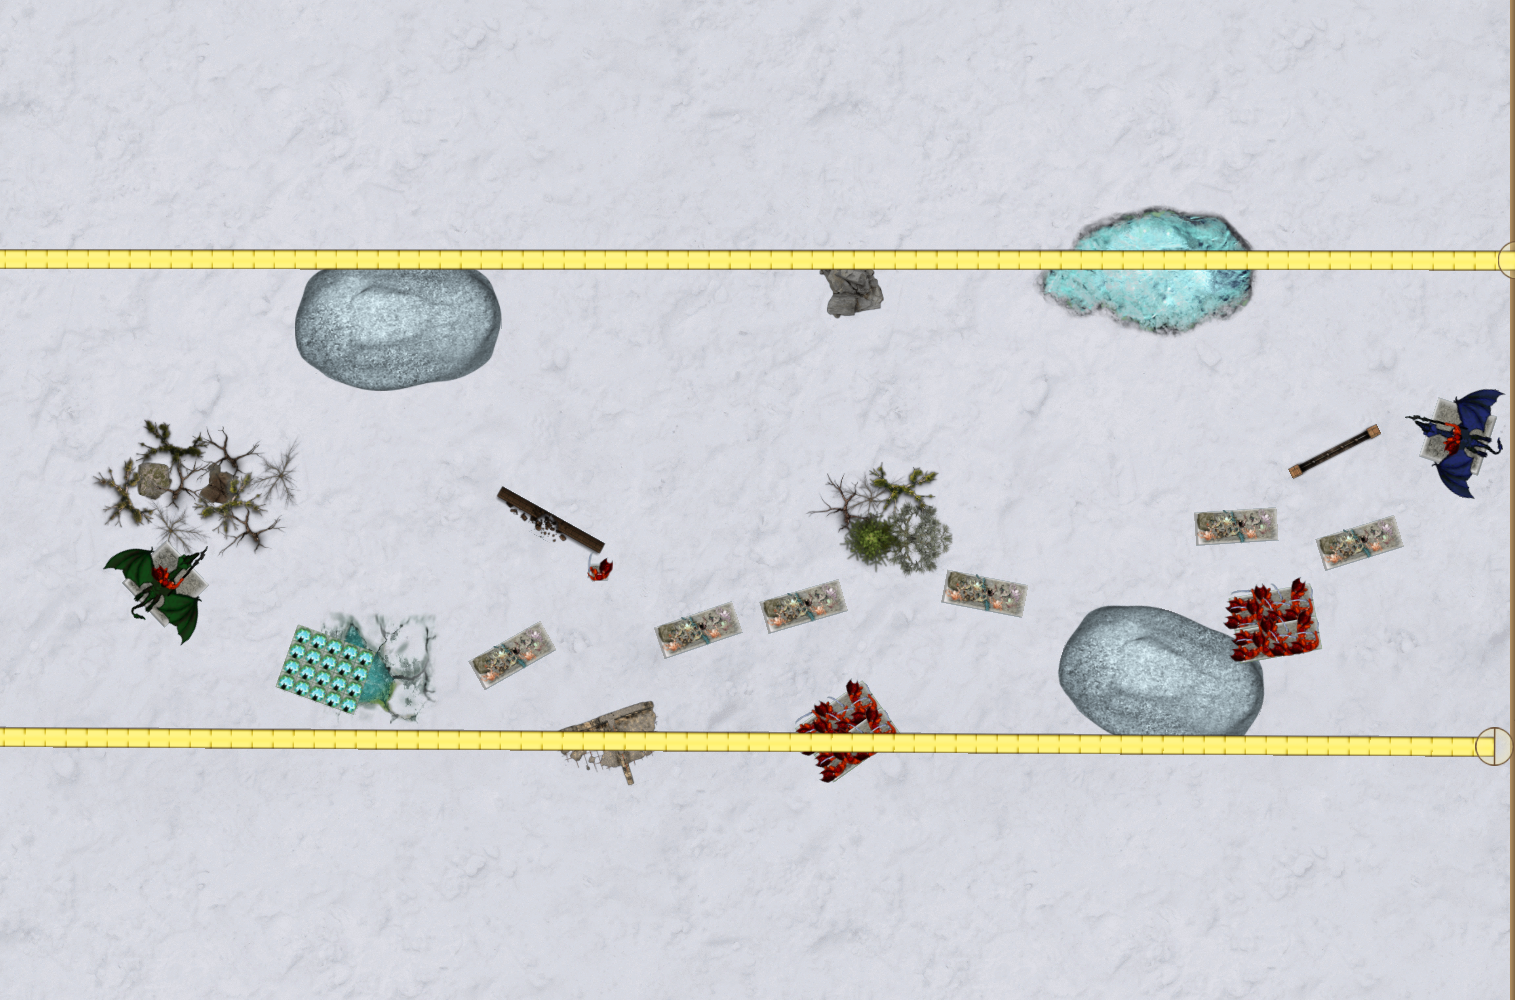
In the Herd version we get access to Beast Pack units, and with their incredible speed you may not need six of them. I could see myself dropping two for a regiment of Great Eagles and Myrddin’s Amulet of the Fire-heart on the Shaman, for example.
This list doesn’t have very many super hammers or flying anvils, but in true Herd fashion it’s much faster and more maneuverable.
Deployment again utilizes one of the flyers as a flank anchor, with the other one being able to pitch in or support the middle. The Lycans look to overtake the right flank, with the nimble Centaurs in position to support or pivot back and support the left flank. Note that the far right Beast Pack is deployed in such a way as to be able to move past the obstacle and pivot 90° to clear it for turn two.

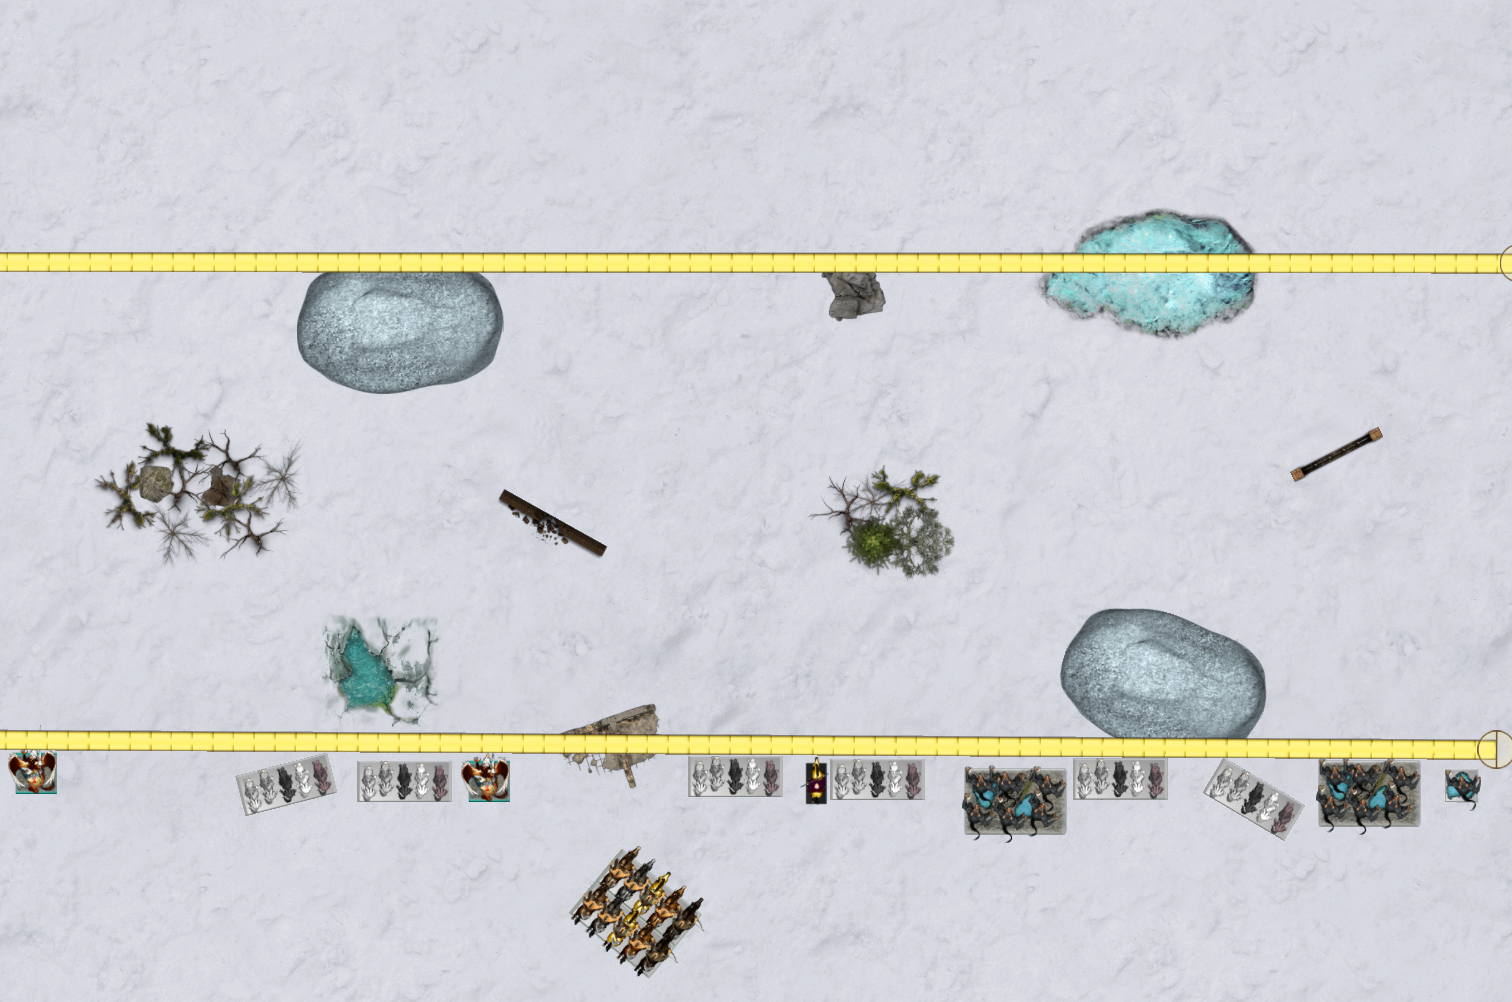
You don’t need flyers for some of these tips to work. In this example, we take all foot, slower Salamanders.
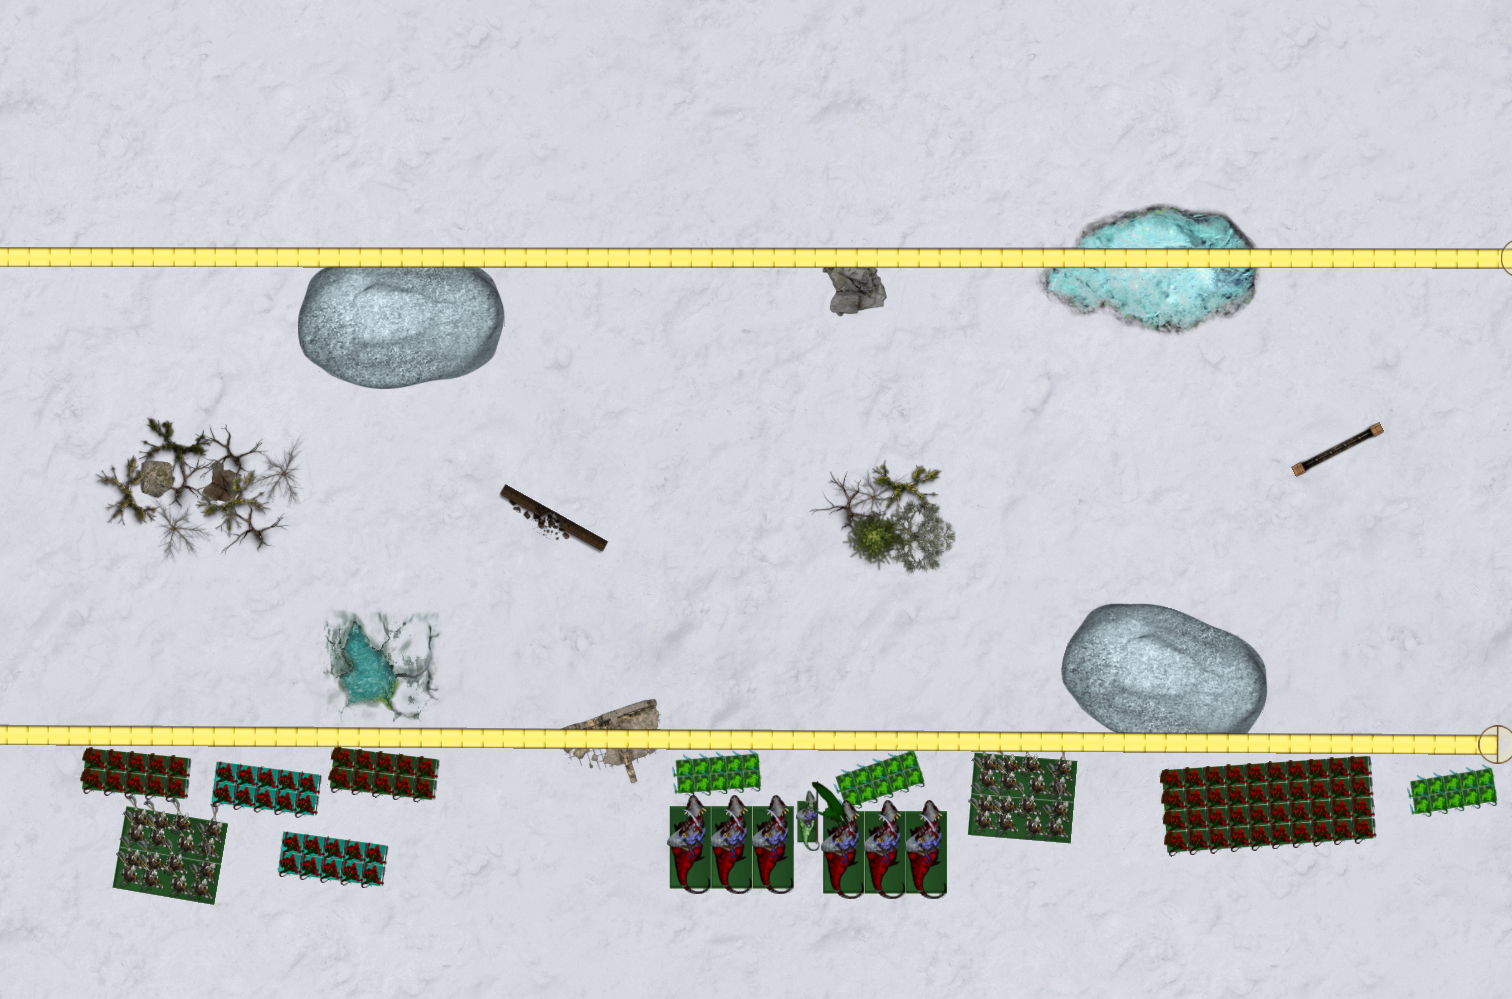
We utilize some of the cheap Ghekkotah for chaff and board control, a horde of Salamander Primes to be our flank anchor (since they are slower, I angle them in toward the center slightly) with the inspiring Ancients supporting them. We have a much stronger center here then in other lists, as that’s what Salamanders tend to excel in. But the left flank with four troops of Primes marching through terrain with a regiment of inspiring Ancients behind them certainly can do some damage.
Hopefully some of my ramblings contained some useful information for people. If I were to provide a TL;DR, I’d say:
- Utilize cheap troops/units for greater board control. Six is a good number.
- Chaff doesn’t have to be super fast to get it’s job done.
- Deploy at angles to maximize your first turn move. Think about where you want your line to end up and work backward from there.
- Be flexible in the opening turns and give yourself room to redeploy your troops if needed.
A big shout out of thanks to Pat for writing such an insightful article!


I’ve not had the chance to play KoW yet, so some of this is over my head, but this is some prime miniatures wargame strategy content right here! Love it!