Note – this article is part of an ongoing series – previous articles can be found here.
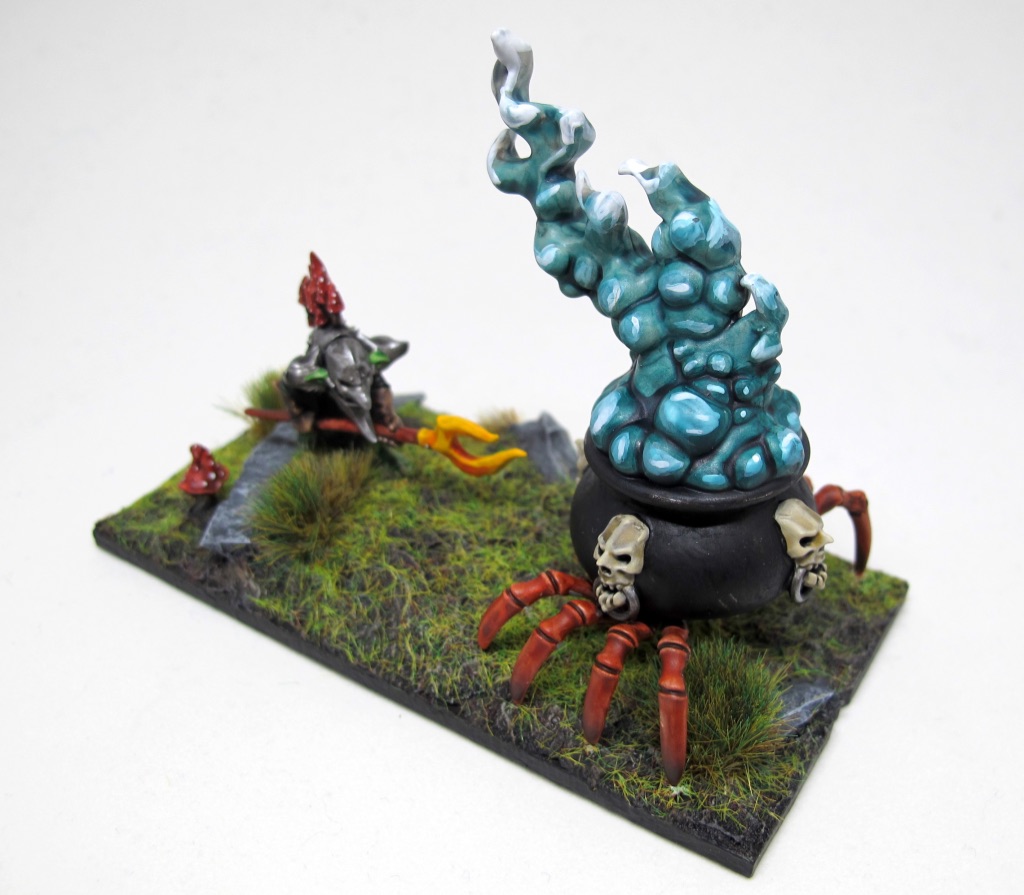
After completing the Red Goblin Sharpstick Horde, I wanted to paint something easier. That meant it was time to tackle the first Red Goblin Blaster. I had spent several weeks trying to decide what model(s) I wanted to use to represent this unit. The traditional interpretation, as seen in the Mantic miniature, is a wagon loaded with explosives. While there is certainly nothing wrong with this, I wasn’t planning to use the Mantic range and painting all that wood seemed a bit boring. I explored all manner of “bomb Squig” models but they seemed too futuristic for Kings of War. Finally, I came across the Endless Spells kit for the GW Gloomspite Gitz and a light bulb went off in my head.
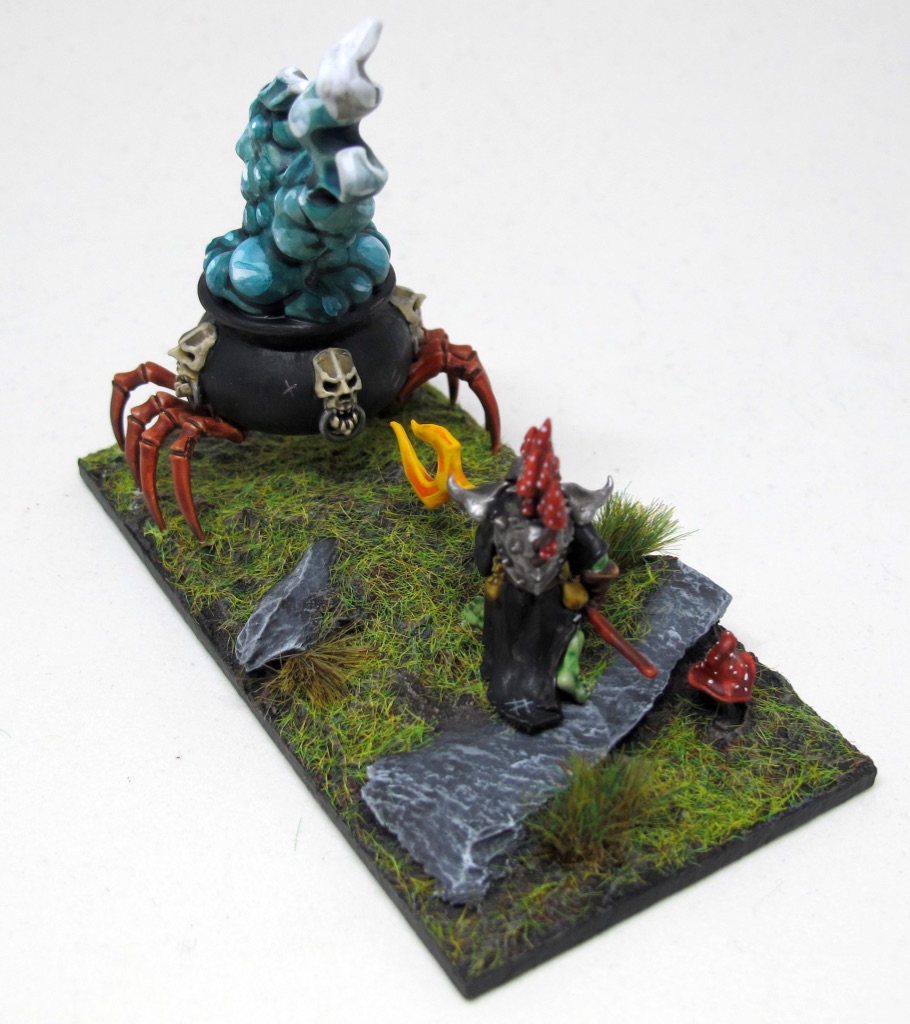
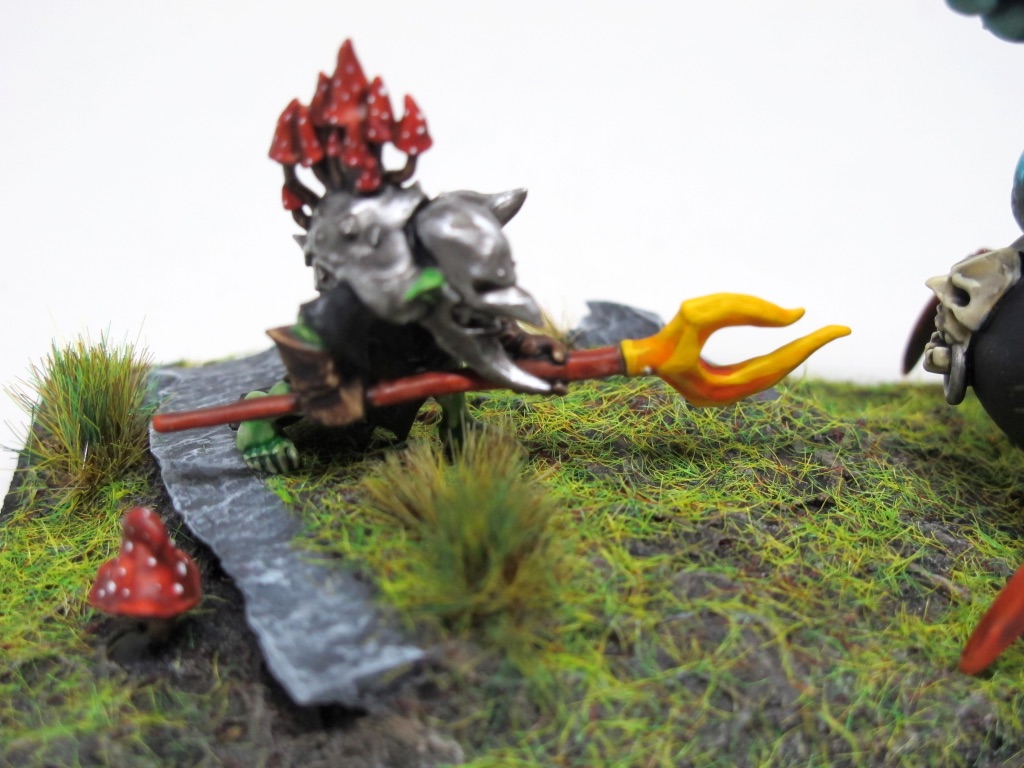
If you haven’t seen the Endless Spells kits for the Age of Sigmar, I highly recommend you check them out. They have one for most factions, and they come with nice miniatures for $35USD. Though they are meant to represent powerful spells on the battlefield, many of them have useful applications for Kings of War. The Gloomspite Gitz kit comes with a massive cauldron that is billowing smoke and running around on spider legs. I was able to pick two of these up for cheap ($12.99USD each) on eBay. I envisioned them being goaded into battle by Squig Herders.
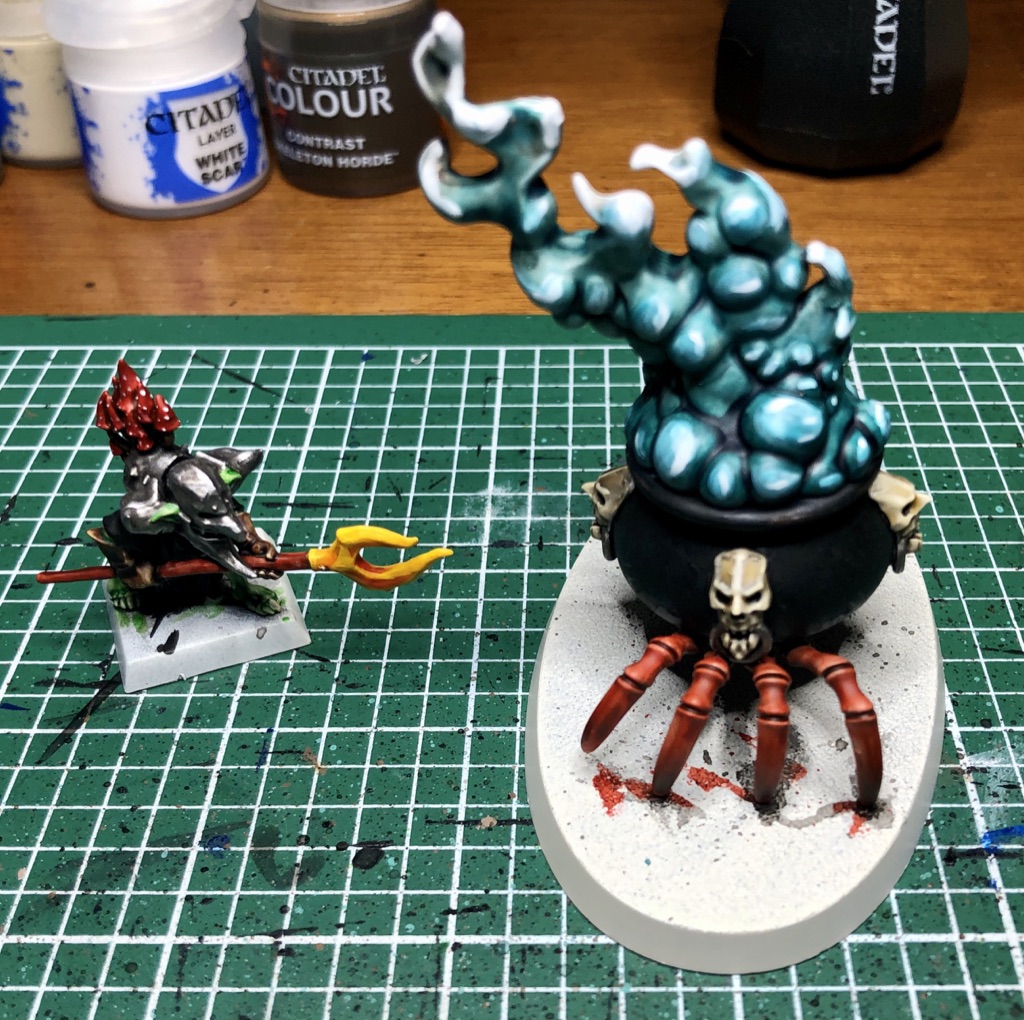
I think this represents the Red Goblin Blaster well because you can imagine the cauldron is filled with a boiling hot mixture that would scald opponents – Crushing Strength (3) – when it crashes into them with random accuracy – Blast (D6). Of course, once the liquid has spilled out it would no longer be able to attack, hence the Boom! special rule.
The smoke was particularly fun to paint, allowing me to blend different Contrast paints to get a gradient effect, and finishing it off with some white highlights. I’m looking forward to building/painting the second one, but I will hold off until the next Red Goblin Sharpstick Horde is complete.

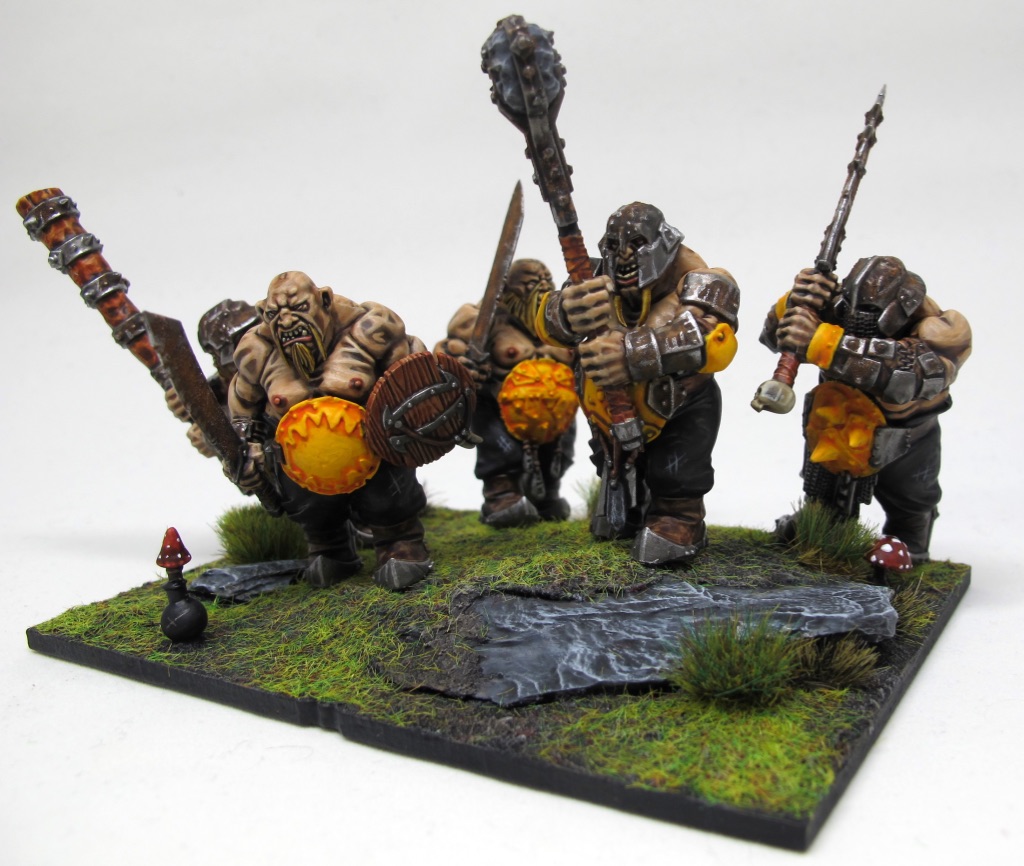
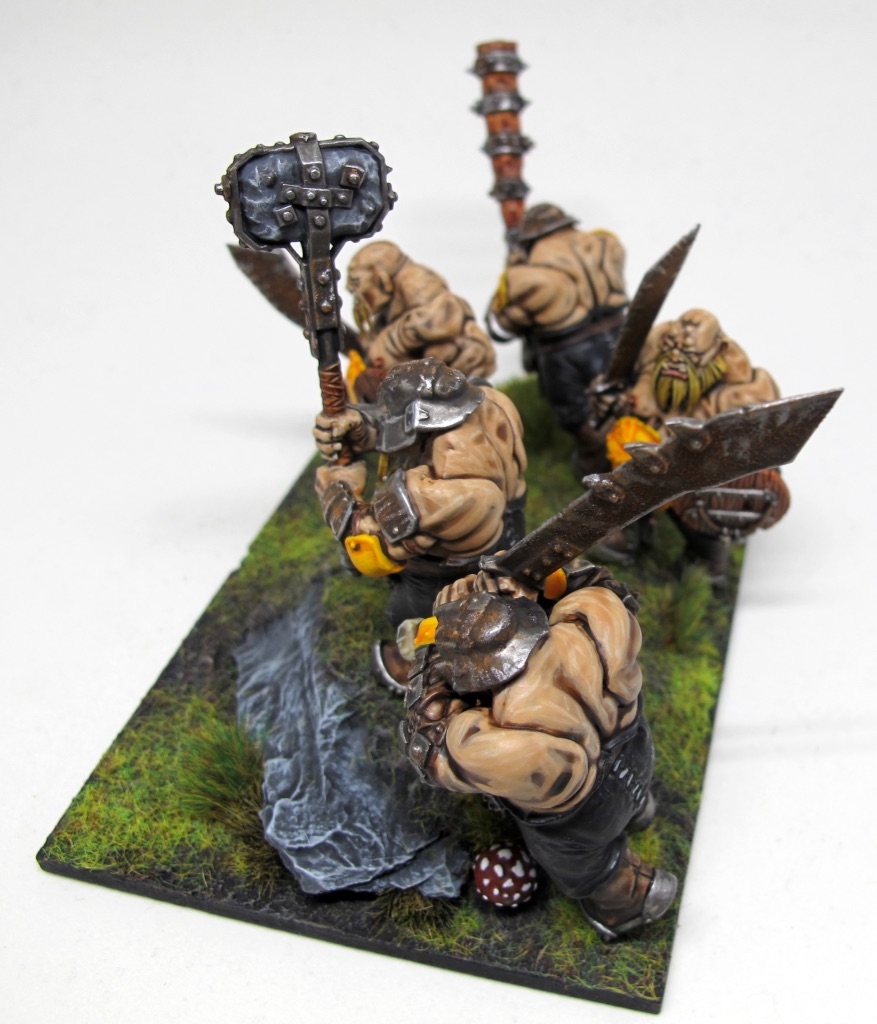
Next, I decided it was time to paint up an actual unit of Ogres. As is the case with many gamers, I have a bits box… well, multiple cabinets really… that is filled to the brim with a random assortment of things I have collected over my two decades in the hobby. Amidst this clutter were three Ironguts models. They were assembled and partially painted. To be honest, I have no idea who painted them or where they came from. I gave them a bath of Simple Green and scrubbed them with an old toothbrush to strip the paint. Interestingly, it took off the paint but not the black primer. I then cleaned the mold lines as best I could. I’ve got to say, second-hand models that are already assembled are not worth the hassle. Unfortunately, Ironguts are currently out-of-print on GW’s website, so I was willing to work with what I had.
After painting these three, I assembled and painted two more of the “regular” Ogres to fill out the unit. I did a minor weapon swap and gave them shields from the old Beast Herd box in order to have them fit the aesthetic for Siege Breakers.
While working on this unit I came across a couple of obstacles. First, the Ogre models tend to have lots of flat, metal surfaces. This looks boring and needs to be broken up somehow. I opted to stick with the classic look and add some rust. I looked up a simple Duncan Rhodes video and copied his technique, using the Citadel Technical Paint, Typhus Corrosion and Citadel Dry Paint, Ryza Rust. Typhus Corrosion has some grit which adds a nice texture to the surface, which is then picked out when you drybrush on the Ryza Rust. This is a super simple and effective technique that fits perfectly with a speed-painting approach – thanks, Duncan!

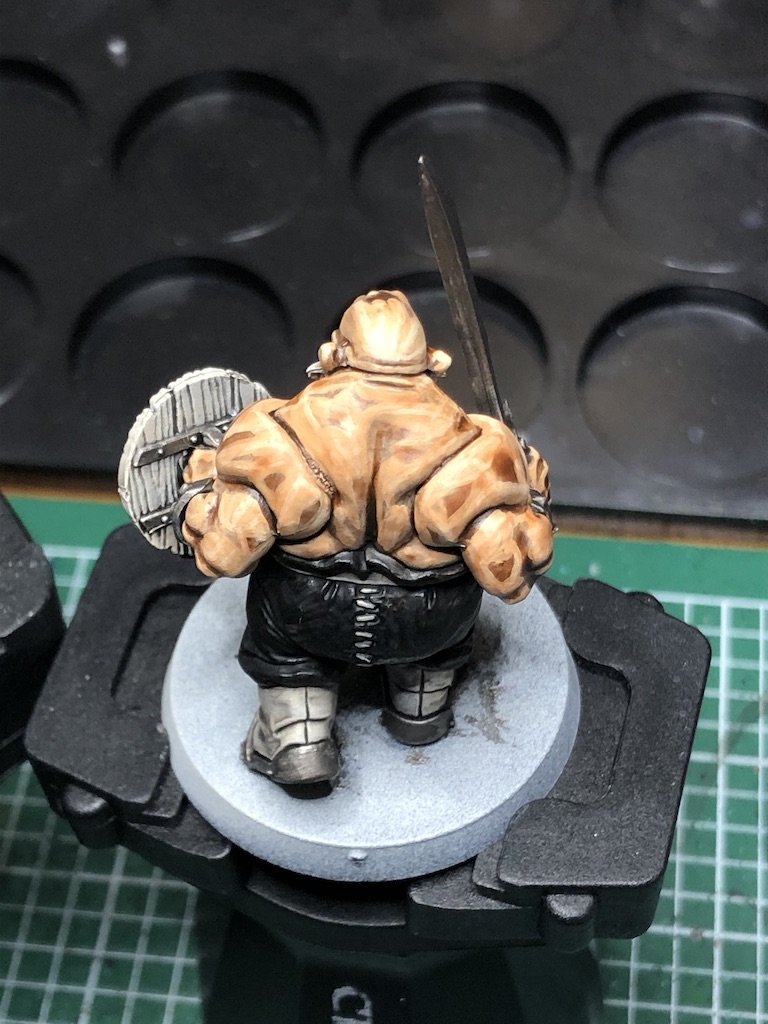
The second obstacle was painting the skin. Ogres have a LOT of exposed skin. I started by applying the Fyreslayer Flesh Contrast paint. On its own, this does not cut it. I tidied it up with two thin layers of Kislev Flesh and thought mayyyyyyyybe I could leave it at that. Thankfully, Jake called me on it when I shared some pics with the Unplugged Radio hosts. It just looks too flat.
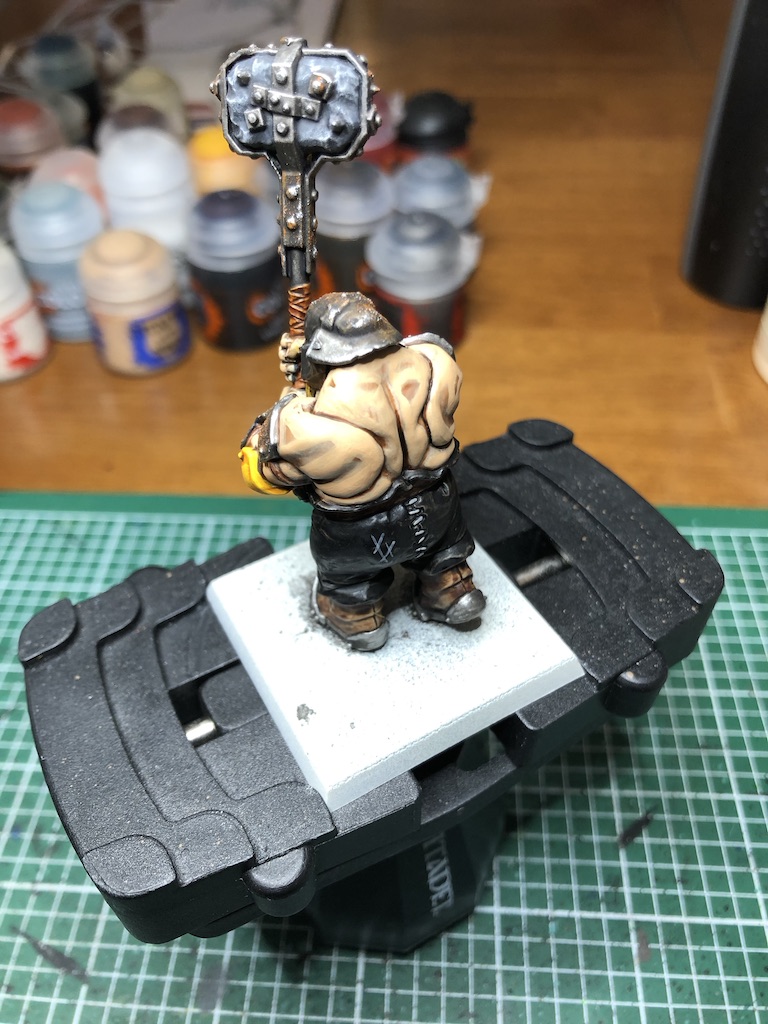
Unfortunately, there is no quick-alternative to painting humanoid skin. You just have to put in the work! I added some highlights with Flayed One Flesh, then tied the whole thing together with a thin glaze of Fyreslayer Flesh. This increases the time per model quite a bit, but I believe the extra effort is worth it. Additionally, I am only painting seventeen Ogre models for the 1995 point list, so it’s not that much extra work.
Once the Ogres were updated and fully finished I put together a unit base and they are now ready to do battle.